Friday, 18 May 2012

Tanks

News from Dave today.  The wall in the bathroom has been removed and the door plated over.  Can't wait to get down and see his handy work.  I have been busy too.  Looking at the issue of water tanks again. 

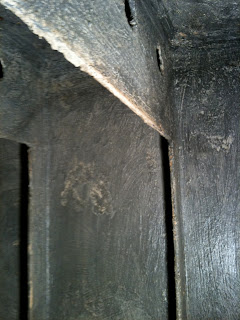
You may recall these pictures of one of the tanks.  They are un the bottom of the hull accessible through a 1m square hatch in the lower deck floor.  Then the hole to get into the tank is quite tight.


The problem is that I would not trust water out of these tanks.  Not to drink anyway.  So I need to get them sorted.  It seems that while we can put a man on the moon and visit the deepest parts of the oceans there is no simple way to do this job.  I would have thought (but turns out I am wrong) that there would be some paint that would be able to go over the existing covering which is approved by WRAS (DWI) for potable water.  But no.  That would be too simple.

There are therefore 2 main options.  The first is an epoxy covering.  Either spray on or paint on.  But it will only work on metal.  The insides of the tanks would need to be sand blasted.  That would be like trying to sand blast the inside of a telephone box on its side while inside it and the box at the bottom of a coal mine.  Nightmare.  I have looked into this and it is doable but will be a horrific job.

The second approach would be to use a lining.  But again this is complicated as there are baffles in the tank (to stop the water sloshing about too badly).  These make the job difficult. 

I think the solution will be to remove the baffles to make the tanks able to be lined.  I will survey them when I am next down.   I suspect I will line two tanks for drinking water and then paint the others with some other covering that is chemically resistant for the waste tanks.

The final alternative would be to fit new tanks but they would need to be fitted on one of the decks and there are advantages to having that weight in the hull and not higher up as it makes the ship less likely to lean.

Sunday, 13 May 2012

Windows

The first day of no rain for longer than I can remember it seems.  So it seemed fitting to spend the delayed first good day of spring catching up with the spring cleaning.  Lots of work has been completed by Dave over the last week or so.  The radio room and the battery room is now cleaned out and is ready to go.  The hatch covered up nicely too ensuring when the walls are done there is no risk of leakage.

The best news was that the first new window was fitted and it looks great.  Note the new window on the right of the wheel house.  Two further windows will be fitted in between the three existing ones.


Now that the majority of the cutting is done (ok, two more windows to go) there was a clean up to do.  The ship was cleared of junk to the deck and the two old UPS boxes (nobody wanted) were dismantled to lighten them enough to shift from the wheelhouse.

It did enable a bit of planning to be undertaken.  A few decisions resulted from some consultation with an interior designer.  The original idea to keep two bathrooms for two shower rooms will be changed to one shower room.  So Dave has been asked to take down the wall between the two existing rooms.  This will leave one entire room as a wet room for shower and the other for sinks etc.  We will also be sealing up the second door (Dave to remove and plate it over).

The second good idea to come forth (and one that was so obvious I kicked myself) was that there are 11 portholes in the windlass room which is totally unused and the cabins have none.  Hmmm.  What should we do.

Dave now has instructions to remove the portholes and fit them into one set of cabins (8 portholes).  This also means that the cabin portholes will be opening ones and they are an exact fit to what was removed in the first place from the cabins.  10.5 inch at the glass, 13 inch bolt to bolt (centre).

The ship is now close to clean enough to start the rebuild.  Some planning is required first of course. There is probably a few more days work on the clean out side (Dave has also got some minor holes to plug and bits to sort).   The layout of the ship is now decided.

Battery Room -> Utilities etc
Radio Room -> Lounge area
Mess -> Dining room
Galley -> New kitchen
two old bathrooms -> one big shower room
two toilets -> two toilets
Wheel House -> office area
Chain room -> large lounge area
Front locker -> master suite and ensuite
Cabins -> Cabins

The first job will be to prepare the cable run plans.  The decision to use radiators for heating means that the pipe runs will also need some careful planning.  Fire places will need to be fitted.  Two new fireplaces are planned.  One on the wheelhouse to warm that room when winter kicks in and one in the radio room.  This one is likely to have a back boiler as it is next to the utility room and can feed hot water tanks (if I get a dual feed tank).  The boiler (yet to be determined) can be put in the windlass room.  Two new chimneys will be needed therefore.  Not a problem for Dave.

The third fireplace will need to go in the dining room.  Further examination of the stove currently there shows that it is not going to survive.  With a new room in place the stove would look old and rusty and the cost of restoration would be prohibitive.    It also has a very small fire in comparison to its size.  So it will need to come out (not just yet).  Given that NOBODY seems to stock this make or model anymore parts will be near impossible to come by.

It was good to be back at the coal face again today.  I have plans that will hopefully speed things up over the summer.  But we will have to see.

Saturday, 28 April 2012

Rainy days

Back on board for the first time in six weeks.  Dave was around and we had a look at the three portholes which he had now restored back to their brass (removed a ton of paint) and they look fantastic.  I now want him to take off the rest and do the same job on the others.  Dave the steel fabricator was jokingly titled Dave the window cleaner today but only briefly (sorry Dave).

I had my first near death experience today though.   The fog horn amplifiers that were on the wall of the radio room needed to be taken off.  I thought they were just circuit boards and so did not bother to check inside.  They weren't.  They were in fact about a ton and a half of transformer.  When I released the last nut from the 4 bolts holding the thing on the wall, nothing happened.  So I tried to lift it.  Nothing.  So I got the crow bar and gave it a shove and it face planted off the wall onto the floor with an enormous bang.  Gulp.  I tried to lift it and could not shift it.  Had I been in front of this as it went I would have been flattened.  Oh well.  On to the next three. 

The easiest way to remove the others was gravity.  A set of seat cushions on the floor and I watched them one by one swan dive from the wall like a crashing acrobat.  Job done.

Then cleaning off the remaining wall behind the amplifiers, stripping off the batons on the ceiling and the room was ready for Dave to clean off.  With only the battery room and the radio room left for Dave to tidy and then we are ready to start the rebuild (well, apart from the portholes which still need to be sourced and fitted).

Photos

The 4 fog horn amplifiers.  No idea how to shift them from here.  They cannot even be lifted by two people.


This is how it was.  The amplifiers mounted on the old ply wall


The back wall now cleaned


Tuesday, 6 March 2012

Spring Clean

This weekend was really just a spring clean.  Months of grinding by Dave left the place with a thin layer of cutting disc dust everywhere.  Out with the brooms and mops and clean clean clean.  Well, maybe just clean clean.

The batteries were removed from the battery room to somewhere safe.  It turns out that the batteries are worth money.  If you can get them to where they need to be.  And they are heavy.  Very heavy.  And lost of them.  So a job for another day.

All tools were cleared, old electrical equipment such as fuse boxes stored and the boat is now clear of junk.  The only rooms left to clear are now the radio room and the battery room.   The radio room has about a day's worth of clearing and a wall to remove.  Then Dave to cut off the the cable racks and weld up the hatch.

With those two rooms and the windows in the wheel house done the only remaining immediate work to do will be to put in all the new portholes into the rest of the ship.  Gulp.  ££££££

Sunday, 12 February 2012

Window wonder

Dave has been a busy guy.  The wheel house has now had three of the unused square portholes (well windows really) removed and plated in.  These will now be put on the front facing wall of the wheel house restoring it to its original layout.

Photos to come.

Sunday, 22 January 2012

All clear ahead

More clearing work this week.  The cabins are now totally cleared of all wiring, lights and switches, carpets etc.  The bathrooms and toilets are suitably stripped down and now there is probably only one more set of grinding for Dave to do to clean off the remaining bits and pieces.

The rest of the time was spent emptying out half a ton of rubbish that had accumulated around the ship while taking everything apart.    The rear deck is now wall to wall rubbish ( I think and 4 skips worth at least).

The stove had dried nicely so it was time to test it.  This time with coal.  It worked a treat.  No smoke, no leaks, no burning paint.  The coal used was smokeless.  The downside was that although it got hot, it did not get as hot as wood.  So even when I tried the kettle on the stove it did not boil.  I think that although it burned coal for over 6 hours (just one small load) it will take many days of heating to get it to a usable temperature for cooking etc.

Finally got the mess (room with stove) cleaned and put some furniture back in.  Now there is a place to eat and drink which is clean and tidy.  And now warm.

Sunday, 15 January 2012

Filler thriller

More progress today (but no photos).  The boat had slowly been filling with junk after the strip out work so spent a lot of time removing it to the rear deck.  All electrics now out apart from the bathrooms.

The stove needed some work so the cracks in the top were filled with fireproof cement, then sprayed with black fireproof paint (after rubbing down the old paint).

So not a lot of jobs done but the boat is now significantly tidier.  When Dave has finished the cutting the boat can get a thorough clean.

Fingers crossed that next week the fire can be lit smoke free.  Just got to get some coal first!

Sunday, 8 January 2012

No smoke without fire. Or burning paint

Dave had done another good job fitting the chimney although the bolts were not long enough for the flange.  So the chimney will be welded on which will seal it better.   So all that remained was to light the fire.  A few issues occurred.  The first was that the fire itself is very very small so all wood has to be cut into 4 or 5 inch lumps.  It is in fact designed for coal (which I will get in future). The second issue was that the fire is not entirely sealed and the plate on the top leaks smoke until it heats up.  The crack (join) in the plates needs to be cemented (I have some).  But the main issue was that it looks like the paint on the top plate is either old or not heat proof.  So it just bubbled and smoke fumes.  Yuk.  It took 20 mins to clear the boat of smoke and get it safe to stay in.

So work to do on the fire.

The new chimney.


Bolts not quite long enough so will be welded.


oops.  Smoke!


Dinky little fire.  What was interesting was that with even a short burn of a small amount of wood the stove got hot and stayed warm for quite a long time.


Having played for a while (fun but not really work) the second set of cabins was started.  Managed to clear all of the lights, cables and trunking.  Also managed to get the carpets up on one room.  Dusty nightmare.

What was interesting was that even on a cold day the cabins were not cold, especially when there was a light (the work lights) in there.  I am now wondering how much insulation is required down there.

Next weekend will be spent completing the cabins (carpets, final wall fittings).

With most of Dave's work done it was time to find some new jobs.  The hatch in the radio room appears to be wooden and so it needs to be taken out and replaced.  The second job was the wheelhouse port holes.  For some reason the front of the ship side is missing 3.  But there are two identical portholes behind the engine room ait vents almost useless (4/5ths blocked).  So those will be removed as will the only square hole on the rear (which overlooks the foghorn supports!).  That will mean the ship will have a full set on the front and the rear one will be replaced with a simple round porthole.

That should keep Dave busy for a while.  Then we will need to think of something really tricky!

Monday, 2 January 2012

Good to be back

One job to achieve today.  The chimney.  Sadly there was no way for this to be done.  The plate upon which the chimney is mounted is held on with quite a few bolts and both the nuts (very large) and blots were rusted.  Even I managed to remove them (which I would not have managed) the bolts would be too far gone to reuse for the chimney.  So another job for Dave.

Talking of which.  Wow.  The amount of cleaning work Dave has done is tremendous.  The walls and ceilings all cleaned of bits of metal, cables, cable trays etc.  It was actually quite odd and the place looked bigger.  So big thanks once more to Dave for his hard work over XMAS.  Its the first time I have been on for a while and it really felt that we had made a leap forward.

So attention was turned to below the main deck and started to strip out one side of the cabins electrical gumpf.  Cables, conduit, lights, switches and plugs nearly all removed and the porthole covers removed from all the cabins.

The flooring (old lino) was removed from the upstairs mess.  Leaving that room now all but ready for rebuild (some minor bits to do).

The other set of cabins will be tackled next weekend.  The cabin flooring needs to be (carefully) removed so as not to damage the bunks and then all the cabins will be ready for insulation.

Which brings me on to my next subject.  Ian and Sue from Onward Mariner have also been busy bees over XMAS and have decided that spray on insulation is the way to go.  They have spoken to three companies and they are looking to do the job over summer (we expect).  The companies are all prepared to do as I had suggested, which is that if they do both boats at once we could get a good discount.  But that gives me (and Ian) a summer target for that stage.  I will need to do some careful calculations to look at the cost (it is truly eye watering) as it would be cheaper to carpet the ship in luxury thick wool carpet than insulate it.  But it is worth doing properly and these guys would sort it all out (soup to nuts as they say).

Hoping to keep the momentum up again this year and really get things moving.  Lots to do so no point dithering.

Pictures from today

I could not remember the maker of the stove so I photographed it today.  Sadly my recollection of it being Jubilee was right which is a problem because I can find no reference to it on the web at all.


The seat in the wheel house was removed.  It was attached to a wall so no way to save it if the insulation is to be applied in here.


Dave has now all but removed the cooking area (which was full of concrete) metal frame.   Good enough for the concrete floor to be put on.


The whole of the entrance corridor has been cleaned of all surplus metal and boxes.  Good job.


Flooring in the mess now dug up.  Need to think what to do with flooring.  Dont really want to concrete so maybe insulation and then wood flooring will do the job.


All porthole covers removed from one side of the cabins.


A huge amount of wiring and conduit removed.


A friend raised a good point the other day.  How will I get the furniture in.  Good point.  Looks like anything not flat pack (sofas) etc will not go through the narrow ship doors.  So some custom furniture is likely to be needed.  


Sunday, 1 January 2012

Stove

Happy New Year all!

This year I hope to make some real progress.  Still lots to achieve but looking back over the last year I can see how much has already been done.  The bulk of the work is still to do.

But my first job of the year is going to be to fit the chimney and try out the stove.  May as well do this now as if it works ok we will have a warm room and route to ridding myself of tons of wood.

The main jobs to complete are

1) Complete the strip out:

  • Carpets from the cabins (rotting)
  • The porthole wood coverings
  • All the electrics from below deck and remaining parts of the ship
  • The cabling up to and in the light itself
  • The plumbing (pipes)
  • The main feed wires from the generator room
2) There is still some structural bits to sort
  • The sea intake values need to be sealed
  • The anodes still to fit (in progress)
  • Acquire and fit portholes
  • The hatch in radio room needs to be examined (what is it) and removed/replaced
3) Then there is some restoration to do
  • The portholes all need to have their paint removed
  • Some doors need restoration to make the look better and work smoothly
4) Then some engineering work is required
  • Plan the electrics (systems)
  • Plan the plumbing (piping requirements and tanks)
  • Plan the heating (boiler location, radiators and pipe runs)
5) Then the rebuild can start
  • Plan the wiring runs
  • Plan the plumbing pipe runs
  • Fit the new wall woodwork
  • Fit the cable and piping (where necessary) conduits (and cover for now)
  • Prepare all walls, ceilings and hull for insulation
6) Insulate ship (huge job to do here)

Once the ship is insulated it will then be a fit out

7) Fit tanks, new ballast pumps and systems
8) Run all cables and piping
9) Fit ply walling (where appropriate)
10) Fit the plasterboard (where appropriate)
11) Fit electrics and lighting
12) Fit heating boiler and systems
13) Fit bathrooms and toilets
14) Fit kitchen
15) Decorate and furnish

17)  There will be then some further engineering work to do
  • Fit out front bedroom and ensuite (will do this last as it has separate access for now)
  • Cut door from chain room to front bedroom
  • Fit out new floors in chain room
  • Convert chain room to usable space
So a lot of work to do still.  Then start to worry about the outside and the repaint.

Busy times ahead.


Tuesday, 20 December 2011

XMAS recap

Merry Christmas to all my followers.

And to Clive who kindly sent me a card he had produced using Gannet Photo.


Thanks Clive and Merry Christmas to you.

Sunday, 4 December 2011

Lesson in concrete

I suppose it is obvious when you think about it but concrete is hard stuff.  In some ways.

Last week Dave kindly removed the metal lid off the floor area in the kitchen where the cooker was housed.  Removing the concrete around that metal was awkward but what we found beneath just raises one question.  Why?  Why on earth did they need to fill the metal surround beneath in more concrete.  Not the weaker stuff they had skimmed the kitchen floor with but full on nasty hard stuff.


The issue in this case was that the concrete was within a full metal surround.  The last time I worked on the concrete I found it broke up easily provided that it had somewhere to go.  Essentially, concrete is excellent under compression but not under tension.  Trying to break this stuff was hard because it had nowhere to go.  It meant that the first hour was spent turning a few square inches to dust.  But as a gap appeared the rest came away easily.    Job done now and Dave can now cut the remainder out.

The radio room cabling is now all but done.  The fog horn amplifiers now just need removing from the wall allowing me to strip back the final woodwork.  

Dave did clean down the wheel house very well.  That room is now clear for a rebuild.  Still in two minds on whether to put back some of the missing portholes in that room.  They are square and I suspect that it will be very hard to find any matching ones.  Pipes now shifted from the kitchen (bilge and sea water) and from the mess.


Monday, 28 November 2011

Snap

I was doing some research on lightships tonight and found LV15.  I thought all trinity ones were different to mine but LV15 looks to be identical in every way other than the room over the windlass (which I know to have  been a later addition to Gannet).  Looks to be moored in Essex.  I have contacted them to try and get a visit.

I will keep you all in the loop!

Sunday, 27 November 2011

Hatch bolts

Dave had done a fine job last week fixing some sliding bolts to the emergency hatches on the cabins.  He also managed to cut out a good chunk of the bilge pump pipes from the kitchen.  This has been a big help to open up that area to reuse for cupboards etc.

The day's work consisted of clearing out the remainder of the main deck's wiring and pulling through to the engine room.   Also managed to clear the mess of the remaining furniture.

Not a lot to report despite a hard day's work.  Just more stripping out does not make an interesting blog update.  But we now have two rooms cleaned and awaiting Dave to remove all outstanding metal work.

That will leave three rooms and the corridors to clean before I can finally start the rebuild.

Sunday, 20 November 2011

Fuse box fun

Had a good time on the boat today removing the fuse boxes.  The large grey old style fuse boxes were in excellent condition but had to go.  They were ugly and place in the most inappropriate places.    The other issue was that they had wired live and neutral the wrong way around.  This did not matter as all connections had fuses on both.  But still not good.  The boxes were fiddly to remove but came out ok.  Now we are just left with the main feeder cabling which is so thick it will need to be cut to remove.

Dave had done an excellent job at removing the metal base of the cooking area.   However there was yet more concrete underneath so that will need to be broken down and removed before he can clean off the remaining metal.  That's a saturday job though due to noise.

Sunday, 6 November 2011

Cutting

A busy day on the boat yesterday.   The strip out had started to stall as the remaining wiring and bits that need to be removed were still in use.  So I took the plunge and headed for screw fix.  With a handful of new extension cables and half a dozen site lights I set out a new ship wide temporary lighting scheme.  I cannot recommend these lights more highly.  They are ideal for the purpose.   Firstly, they are cheap.  The 120w version (good for lighting a room) costs less than a tenner.  The 400W version costs £11 and the twin lights on tripod stand costs around £26.  They are excellent value for money.  The second up side of these is that they get really hot.  Not good in summer but they make a big difference to the heating of the boat.  Heat and light in one cheap solution.

With the ship lights now sorted the remain cable came out quickly.  Now all but the 3 main consumer unit feed cables are out and clear.  Next job will be to physically remove the old lights and consumer units.   With a new set of cable cutters which I bought a month ago for the data centre strip out it was fast work.  Blisters and hacking with normal wire cutters used to take about 30 secs to a min to cut through.  These new cutters cut through the wire like scissors through string.  Anyone doing boat work should get some of these.

With all the wire now out the remaining rooms can be stripped down pronto.  It will soon be time to start planning the build.

Saturday, 29 October 2011

Otter

When I was done tonight I locked up and spent a few mins enjoying the views from the ship.  One thing I noted was what looked like the head of a seal bob up in the mariner.  It was over by the yachts so could not see clearly.  Then it disappeared and bobbed up again.  It soon became clear that it had a fish.  But what caught me by surprise was when it turned on its back and pulled at the fish with claws.

I have never seen an otter in the wild and never expected to see one dining in our marina.

Back in the kitchen

It was time to get out the power tools again.  Big grin.  Always fun.

Remember this?  Its the raised chunk of metal on concrete used to hold the old cooker.  It has to go.


Underneath the metal appeared to be a lot of concrete.  To enable us to cut it out it had to be dug out.  A job for the jack hammer.


Not an easy job.  But given an hour or so I managed to cut it all out to find it sitting on a large metal base.  Dave has given it the once over and is now ready to use cutting tools on it.


Once removed it will provide a large level area (with the rest of the kitchen) to fit out with whatever it is I put in the kitchen.

I also made the decision to remove all the bilge pump piping for a number of reasons.  The first is that it is old and ugly in its current routing.  The second is that now the ship is not out at see it has less use.  But the main reason is that it is driven by a very large and old pump which is unlikely to ever work again.  There will be a need for bilge pumps but I can fit modern ones below and use other routes for the pipes.

The other pipe in the kitchen was the green sea water pipe which is connected to the hull below the water line.  Its a pipe that makes me nervous if I am honest.  Its only use was to pump in sea water to push through the fire pipes.  Again the pump is the non working bilge pump.  There is simply no need for it.  So the plan is that, rather than risk removing it, Dave will weld a plate over the outside and we will cap it off in the engine room above water level.  Belt and braces.

I got to meet the neighbours today.  A nice couple (Ian and Sue) who have bought Onward Mariner.  So I was lucky enough to get another viewing of a ship I nearly bought.  It looks like a great project and the ship is in great condition.  They are new to this too so we will be sharing the little knowledge I have to date.  Good luck Sue and Ian.

Apart from some tidying up and getting all tools back to the main workshop (they were everywhere) it was a quiet day.

But good to be back.

Sunday, 16 October 2011

Spares

I have just about moved office which included the closing down and stripping out of our data centre.  Managed to pick up some spare electrical components (Merlin cabinets of MCBs etc) and a pile of heavy duty (high current) cables.  Not long ones but perfect for using to join the main components and batteries.

Just need to find the time to get down there and start to finish some of the rooms.

Saturday, 3 September 2011

Lucky escape!

A great day back on the ship today.  Dave had delivered the anodes and nice and shiny they were too.  Thanks Dave.  Note that Dave is no longer 'Dave the welder' and all references to this steel miracle worker as such have been removed from my blog (not Dave, just 'the welder').  We had a laugh today and he (jokingly explained) that someone had wondered why I had got away with calling him Dave the welder without finding my landrover welded upside down to the side of my boat one day.  (and if anyone could achieve that, Dave could).  I had an education on the proper hierarchy of steel working and Dave is actually (official title) Dave the Fabricator.  It does not have the same ring to it but it does better represent the skills of an engineer who can weld rather than a welder.

Dave, consider myself educated! Lol.  And please don't weld my car to my boat when I am not looking.

Anyway, joking aside, I did do some light work today as I had friends and their parents (other keen blog followers) over to give the tour.

I am now getting close to having all the walls of all the rooms cleared of bits and bobs that prevent the insulation going on.  I need to clear all the rooms of stuff so that Dave (no longer the welder, now the fabricator :->  he is going to kill me..) will be able to remove the various brackets from around the ship in one go.

I managed to removed the various signs, the engine room vent fans, 2 bells, 4 fire alarm buttons, the control panels and lights by the back door and a few other bits like the wiring.  Its fiddly work that takes time but does not look like one has done much when one has finished.

The various FM200 (previously Halon) gas fire suppression tanks could be triggered by these buttons.  I have removed them for now as I need to sort the walls out and then decide whether to refit or modernise.


The engine rooms have some major fans and air ducts running down there.  Not sure if they suck or blow.  But the control panels are on an external wall of the ship and if I leave them on in this position then the insulation will be impossible to fit.  Most of this kit will need to be rehoused (if needed at all) in the old battery room.


Next to the door was the original manual/automatic switch panel for the halon tanks and controls.  Sensible as I would assume the idea was to be able to switch to manual when on board and automatic when off thus reducing the risk of being in a room when one goes off (and killing you).  Not needed anymore as although I may have the bottles in the engine room stay in place I would want the controls modernised and probably manual only.  As I will only ever run the generators when I am on board it seems pointless to worry about the automatic sensors.


A few notice boards gone (in the store now).  Not that interesting a photo I have to say!


It is coming to the point where I will have to start fitting alternative lights (temp) while I strip out all the old electrics.  That will be fun :->


Tuesday, 30 August 2011

Anodes on their way

Its holiday season so not been on board much.  Not lost interest but needed a break.  The new hatch being fitted was a milestone.  It gave me the confidence that there was little that could not be authentically put right.  So the pressure was off to try and protect certain rusting parts as I know they can be replaced and look a million times better.

Apart from the hull that is.  So Dave has ordered a buch of zinc anodes to bolt on to help protect the hull.  That will help.  The transformer protects it to some extent but insurance requires me to fit these things.

I still cannot find anyone interested in the large battery chargers.  Which means it may be time to cut them up to dispose of them.  So if anyone knows anyone who wants some let me know!

Sunday, 14 August 2011

Just about done in the wheelhouse

I was working to complete the wheel house today.  Cleaned out the remaining wiring which included the lights and sockets.  It struck me today that to get the ship to the position where it can be insulated I will now need to strip out the remaining electrics including lights and sockets.  This means I have to put in some temporary lights and cabling to keep me going in the mean time.   Should not be too difficult.

So the only remaining cable in the wheel house is now the single cable feeding the standby foghorn.  This just needs to be neatly run along its current route and then insulated.  I only now have to remove the remaining furniture, get Dave to cut out all the bits still on the walls.  Then that will be 2 rooms ready (mess and wheelhouse).

The second job was the removal of the foghorn ballasts (those odd wire mesh heating elements).  If the horns are to work these will be needed but I do not want them where they are now (were) and will move them over to the windlass room.

The battery room still needs to be cleaned of its batteries and some lights removed (a day's work) and that will be room 3.  The final room will then be the radio room.

The galley still needs the cooking platform removed (so out with the concrete breaker, big GRIN, he he).


All lights now removed.  Just the ceiling wiring trays to remove (Dave)


The 4 foghorn ballasts


One was under the water tank that fed the bilge pump.


One was by the burglo alarm (that was its brand name for the burglar alarm)


Two were in the main area by the mess and the bathrooms.  They were really ugly so it is better they are moved from this area.  The two distribution boards will also be gone.  Just need to put in alternative light circuits for a while so I can remove these.


Monday, 8 August 2011

The joys of part time work

Well, after some time away I found myself back on the boat and knee deep in wiring again. The news for today was that the new hatch was fitted. Dave had done a superb job producing an exact replica of the original and putting back the original porthole and weights. It now opens like a dream.

I manage to clear out the remainder of the wheel house fire systems and strange brown wooden box. Makes a big difference to the space. Cleared out much of the fire system wiring. So some progress was made again today. The battery chargers are unshiftable alone. The transformer itself can only just be lifted but not moved and the cabinets are similar. I have no idea how I managed to get them off the wall in the first place.


Introducing Dave.  Miracle worker in steel.  Thanks for the new hatch Dave!


The wheel house cleared of the old wooden box


And fire systems


The transformer still here because it is unliftable!